Travel Tips
Beach Photography Tips: Capturing Your Coastal Memories
The tantalizing turquoise waves, the sapphire expanse of the sky, and the glistening sandy beaches- these ethereal elements come together to create a spectacular canvas for unforgettable beach photographs. But how often have you tried to encapsulate these enchanting views into your frame, only to end up with washed-out or overexposed images that do no justice to the actual beauty? As heartbreaking as it can be, fear not! Our “Beach Photography Tips: Capturing Your Coastal Memories in Style” will transform you from an average shutterbug to a maestro of coastal imagery. So dive into this ocean of knowledge and prepare to adorn your photo albums with splendid sunsets, surreal seascapes, and captivating beach portraits like never before!
Essential Equipment for Beach Photography
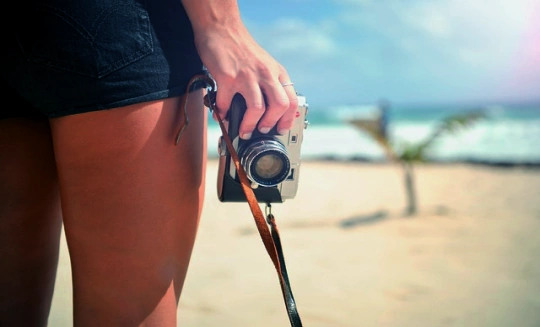
Before heading to the beach, it’s essential to carry the right equipment to capture those fantastic memories that will last a lifetime. Some of the basic equipment for beach photography includes a camera, a tripod, and waterproof bags or covers.
A good quality camera is essential for beach photography. You can choose between a point-and-shoot camera or a DSLR camera. A DSLR camera provides better control over settings, produces high-quality images, and allows you to switch lenses as required. However, a point-and-shoot camera is an excellent alternative if you’re traveling light and on a budget.
Next on the list is the tripod. A tripod is necessary for capturing stable images, especially during low-light conditions or when using a longer shutter speed. A tripod also aids in keeping the camera steady while shooting macro close-ups or low-angle shots of waves breaking on the shore.
Lastly, waterproof bags or covers are crucial for protecting your equipment from moisture and sand particles when working at the beach. These protective gears come in various sizes, shapes, and materials. They keep your gear safe from salt water and other forms of liquids that can harm your gear.
Must-have Lenses and Filters
The type of lens used plays an important role in determining how well your images turn out. There are several types of lenses used in beach photography: wide-angle lenses, zoom lenses, prime lenses, and macro lenses. Filters are also essential, as they help reduce glare, improve contrast, and create a unique look.
A wide-angle lens is an excellent choice for beach photography as it allows you to capture more of the scene and create a sense of space and depth within your images. Such lenses also work perfectly in low-light situations when paired with a larger aperture.
Zoom lenses come in handy when photographing wildlife or other subjects from afar. They allow you to get closer views without having to move physically close to your subjects.
Prime lenses provide the best image quality but do not zoom. These types of lenses are perfect for portrait shooting or high-resolution shots that require the utmost clarity. Prime lenses typically have larger apertures, which enable them to achieve more shallow depth-of-field effects.
Macro lenses are useful for capturing close-up shots of small subjects such as beach creatures or plants. They are great at highlighting details and textures invisible to the naked eye and create the illusion of bokeh-blurred backgrounds.
Filters, such as polarizing filters and UV filters, can dramatically enhance photos taken at the beach by reducing glare, reflections, and haze. They also offer superior color saturation and improved contrast. Polarizing filters increase color richness by removing unwanted reflections from surfaces such as water or sand.
It’s important to note that using filters should be done sparingly. Otherwise, you risk ending up with harsh colors that don’t depict reality accurately. For instance, too much polarization can result in dark patches appearing suddenly on reflective surfaces. Such issues call for lessening the intensity of filters as required.
It’s not uncommon for photographers to blow their budgets on multiple lenses or carry all their equipment to the beach only to realize that they don’t need half of what they brought. However, the truth is, that you do not necessarily need a boxload of fancy gear to capture breathtaking beach photographs. In many cases, carrying a few high-quality lenses and filters will suffice.
Composition and Lighting Techniques
Beach photography requires a little bit of creativity, especially when it comes to composition and lighting. Without the right techniques, photos can appear uninteresting or simply plain. Here are a few tips on how to effectively enhance your beach photographs through clever composition and lighting adjustments.
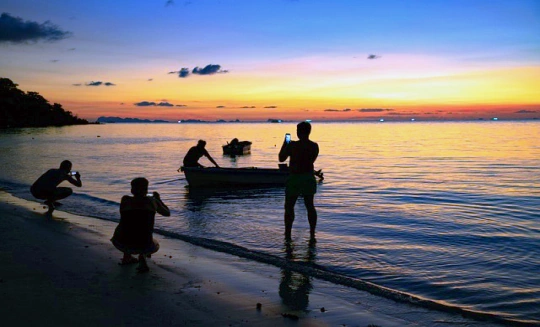
One approach to effective beach photography is to experiment with light sources. Sunrise and sunset provide the perfect natural lighting, allowing you to capture shots rich in contrast with soft shadows and highlights. Don’t forget that different times of day may also offer unique lighting scenarios: for example, shooting during cloud-covered days would produce a soft diffused light or play with underexposure to produce dramatic and moody results.
One effective technique for beach photography is the rule of thirds. This means dividing your image into thirds both horizontally and vertically and positioning the areas of interest in line with these imaginary lines. The rule of thirds will create a balanced composition, giving your shot a professional look.
Conversely, an uneven horizon in a landscape photo can make it feel awkward. So it’s important to keep the horizon straight to preserve the balance of the frame. This can always be corrected in editing software such as Lightroom, but it’s recommended to strive for accuracy in the camera as much as possible; this allows for cropping flexibility after exporting RAW formats where necessary.
Better compositions often lead to more visually appealing images. Coupled with lighting techniques that help emphasize these elements, using sunlight and natural colors enhances photo depth and produces excellent pictures.
Using Sunlight and Natural Colors
The sun is essential to beach photography; its light creates opportunities for high-contrast shots while also illuminating natural colors around you. Keep reading for some inventive ways to use natural light in your photographs.
Shooting during the “golden hour”, that magical time shortly after sunrise and before sunset, is a great way to work with natural light. This provides a warm natural glow to the scene, adding that special touch of magic to your beach photographs. Alternatively, experimenting with over-exposure techniques can also produce some noteworthy images.
Play around with different angles; the sunlight’s position in relation to your shot will affect the end result. Using backlighting results in richer contrast, consuming the detail of the shots’ silhouette along its edge. Alternatively, front lighting illuminates every detail directly, making all objects crystal clear but losing their dramatic value for some scenes.
On occasion, however, harsh or direct sunlight can cause issues. For example, if you’re trying to capture an image of someone’s face spoon cast by shadows from surrounding objects, the photo will be too bright or too dark on either side, creating unflattering results in most cases.
When it comes down to it, though, there’s no “right” way to approach beach photography. Get out there and practice shooting in various lighting scenarios: backlighting or during overcast days for otherworldly landscapes or moody photos; low-angle sunlight for optimal shadows off sand dunes; experiment with creative composition techniques and adjust settings such as exposure and filters accordingly until you find precisely what suits you.
Achieving the Best Perspective and Angle
When it comes to beach photography, the right angle and perspective can make all the difference in the final outcome of your photos. Experimenting with different angles can help you capture unique shots that truly bring out the beauty of the beach environment.
An example of a great angle would be to get down low to capture an interesting foreground against the background, such as beach grasses with sand dunes in the distance. Another example would be to experiment with close-up shots of beach textures, like ripples in the sand made by receding waves. Even aerial shots of beaches from a drone can offer a new and exciting perspective.
Properly positioning your subject is also key to achieving the best perspective. Keep in mind that adding depth and layering your composition can really make images stand out. For instance, placing a person or object in front of other recognizable features like rock formations or sunsets will add dimension to your photograph.
When considering angles and perspectives, think about how you want people to feel when they see your photo; think ahead of time about what kind of story you want your photo to tell.
Tips on Macro Photography and Detail Highlighting
Macro photography is all about capturing small details that often go unnoticed from afar. It’s an excellent way to highlight points of interest or texture on the beach that are easy to miss, such as tiny shells or starfish among pebbles in tide pools.
When taking macro photos at the beach, pay attention to lighting and focus, as they can make or break a shot – even in minimal ways. Morning and evening light provide soft, warm tones that create an ideal atmosphere for macro photography and a prime opportunity to experiment with different natural shadows.
When it comes to focus, it’s essential to choose your focal point carefully. Play with odd angles or move around and try different perspectives; sometimes the smallest adjustments can make all the difference. If possible, use manual focus and try bracketing your exposures to ensure that you capture a range of light levels.
Perhaps you’re hoping to capture photos of tiny creatures that inhabit the beach environment. Achieving good detail while shooting in nature can be challenging without proper equipment though; consider using a special lens such as an extension tube or telephoto macro lens – these are great tools for capturing fine details at close range, while still offering high-quality images.
Finally, remember to think creatively about incorporating macro shots into your larger compositions. A photograph of a crab crawling on the sand is striking by itself but might seem more significant when included in a photo series of other aspects of the beach.
Field Techniques for Macro Shots
Capturing the beauty of small details on the beach can add a unique and interesting touch to your photography. But how can you make sure those macro shots are as stunning as possible? Here are some field techniques to consider:
Firstly, experiment with different apertures to get the right depth of field. A wider aperture (smaller f-number) will give you a shallow depth of field, which is perfect for isolating your subject from the background. On the other hand, a smaller aperture (larger f-number) will give you more depth of field, which can be useful when you want to include more of the environment around your subject.
Secondly, pay attention to lighting. The harsh sunlight at midday may not be ideal for macro shots, as it can create strong shadows and overexposure. Instead, try shooting during the golden hours, just after sunrise or before sunset, when the light is warmer and softer. You can also experiment with backlighting to create interesting silhouettes or rim lighting effects.
Thirdly, consider your composition carefully. Look for interesting shapes, patterns, and textures in your subject that can add visual interest to your shot. Consider using the rule of thirds or placing your subject off-center for a more compelling composition. However, remember that rules are made to be broken – sometimes centering your subject can create a bold and striking effect.
Post-Processing Tips for Coastal Memories
Post-processing has become part and parcel of modern photography. While it’s important not to over-edit your photos and lose their natural charm, a few subtle tweaks here and there can make a big difference. Here are some post-processing tips to get you started:
Firstly, consider shooting in RAW format if your camera allows it. RAW files contain more image data and give you greater control over exposure, color balance, and other aspects of your photo during editing. It’s also easier to fix mistakes or make adjustments without losing image quality.
Secondly, think of post-processing as seasoning – a little goes a long way. Avoid relying too heavily on filters or presets, as they can quickly make your photos look artificial or overdone. Instead, focus on adjusting key elements such as brightness, contrast, saturation, and sharpness to bring out the best in your image.
Thirdly, pay attention to the colors in your photo. Beach scenes often feature vibrant blues, greens, and yellows that can be enhanced with post-processing. Try using the vibrance or saturation sliders to bring out these colors without making them look unrealistic or oversaturated.
By applying these field techniques for macro shots and post-processing tips to your beach photography repertoire, we’re confident that you’ll be able to capture stunning coastal memories in style!
Elevate your beach photography with Vibe Getaways. Our expert tips and insights transform amateurs into coastal maestros. From essential equipment to lens selection, composition, and mastering natural light, we guide you through each step. Discover field techniques for exquisite macro shots and learn post-processing finesse for perfect coastal memories. Remember, it’s not about a plethora of gear, but the right knowledge. Visit our website for more enriching travel experiences. Let your journey be a masterpiece with Vibe Getaways.
Vibe Getaways will help you capture the spirit of your seaside vacation. Our ‘Beach Photography Tips’ article provides expert advice on how to make your memories endure a lifetime. Contact (262) 891-4768 today to begin a voyage of amazing beach photography. Trust Vibe Getaways to capture your ideal beach moments!

About the Author
Adam Anderson is the Owner and CEO of VibeGetaways and a travel advisor with over 15 years of experience specializing in luxury all-inclusive vacations and cruise travel. As a Certified Sandals Specialist and CLIA member, he helps travelers design unforgettable experiences around the world.
More Articles
Adults‑Only Resorts for Digital Detox Escapes
The Modern Need to Unplug and Reconnect Technology shapes much of our lives, but it can also overwhelm us. Endless…

Why Adults‑Only Vacations Feel More Exclusive
Rediscovering Tranquility in a Child‑Free Space When we plan an escape for our clients, we always start by listening to…

Group Getaways for Sports and Fitness Fans
Celebrating Active Lifestyles Together We love nothing more than helping like‑minded travelers celebrate special milestones and passions. Whether it’s an…

Best Resort Packages for Pickleball Enthusiasts
Pickleball has exploded from local community courts into a full‑blown travel trend. As travel planners and avid players ourselves, we…